> ## Documentation Index
> Fetch the complete documentation index at: https://docs.autocoder.cc/docs/llms.txt
> Use this file to discover all available pages before exploring further.
# Publish, Deploy & Host Apps with AutoCoder.cc
> Publish your AutoCoder.cc project to a live URL with one click, point a custom domain at it, and export source code anytime. This page covers deployment, hosting options, custom domains, and source-code export.
 ## Project launch
Launch your project externally, including webside and domain configuration.
### Web deployment
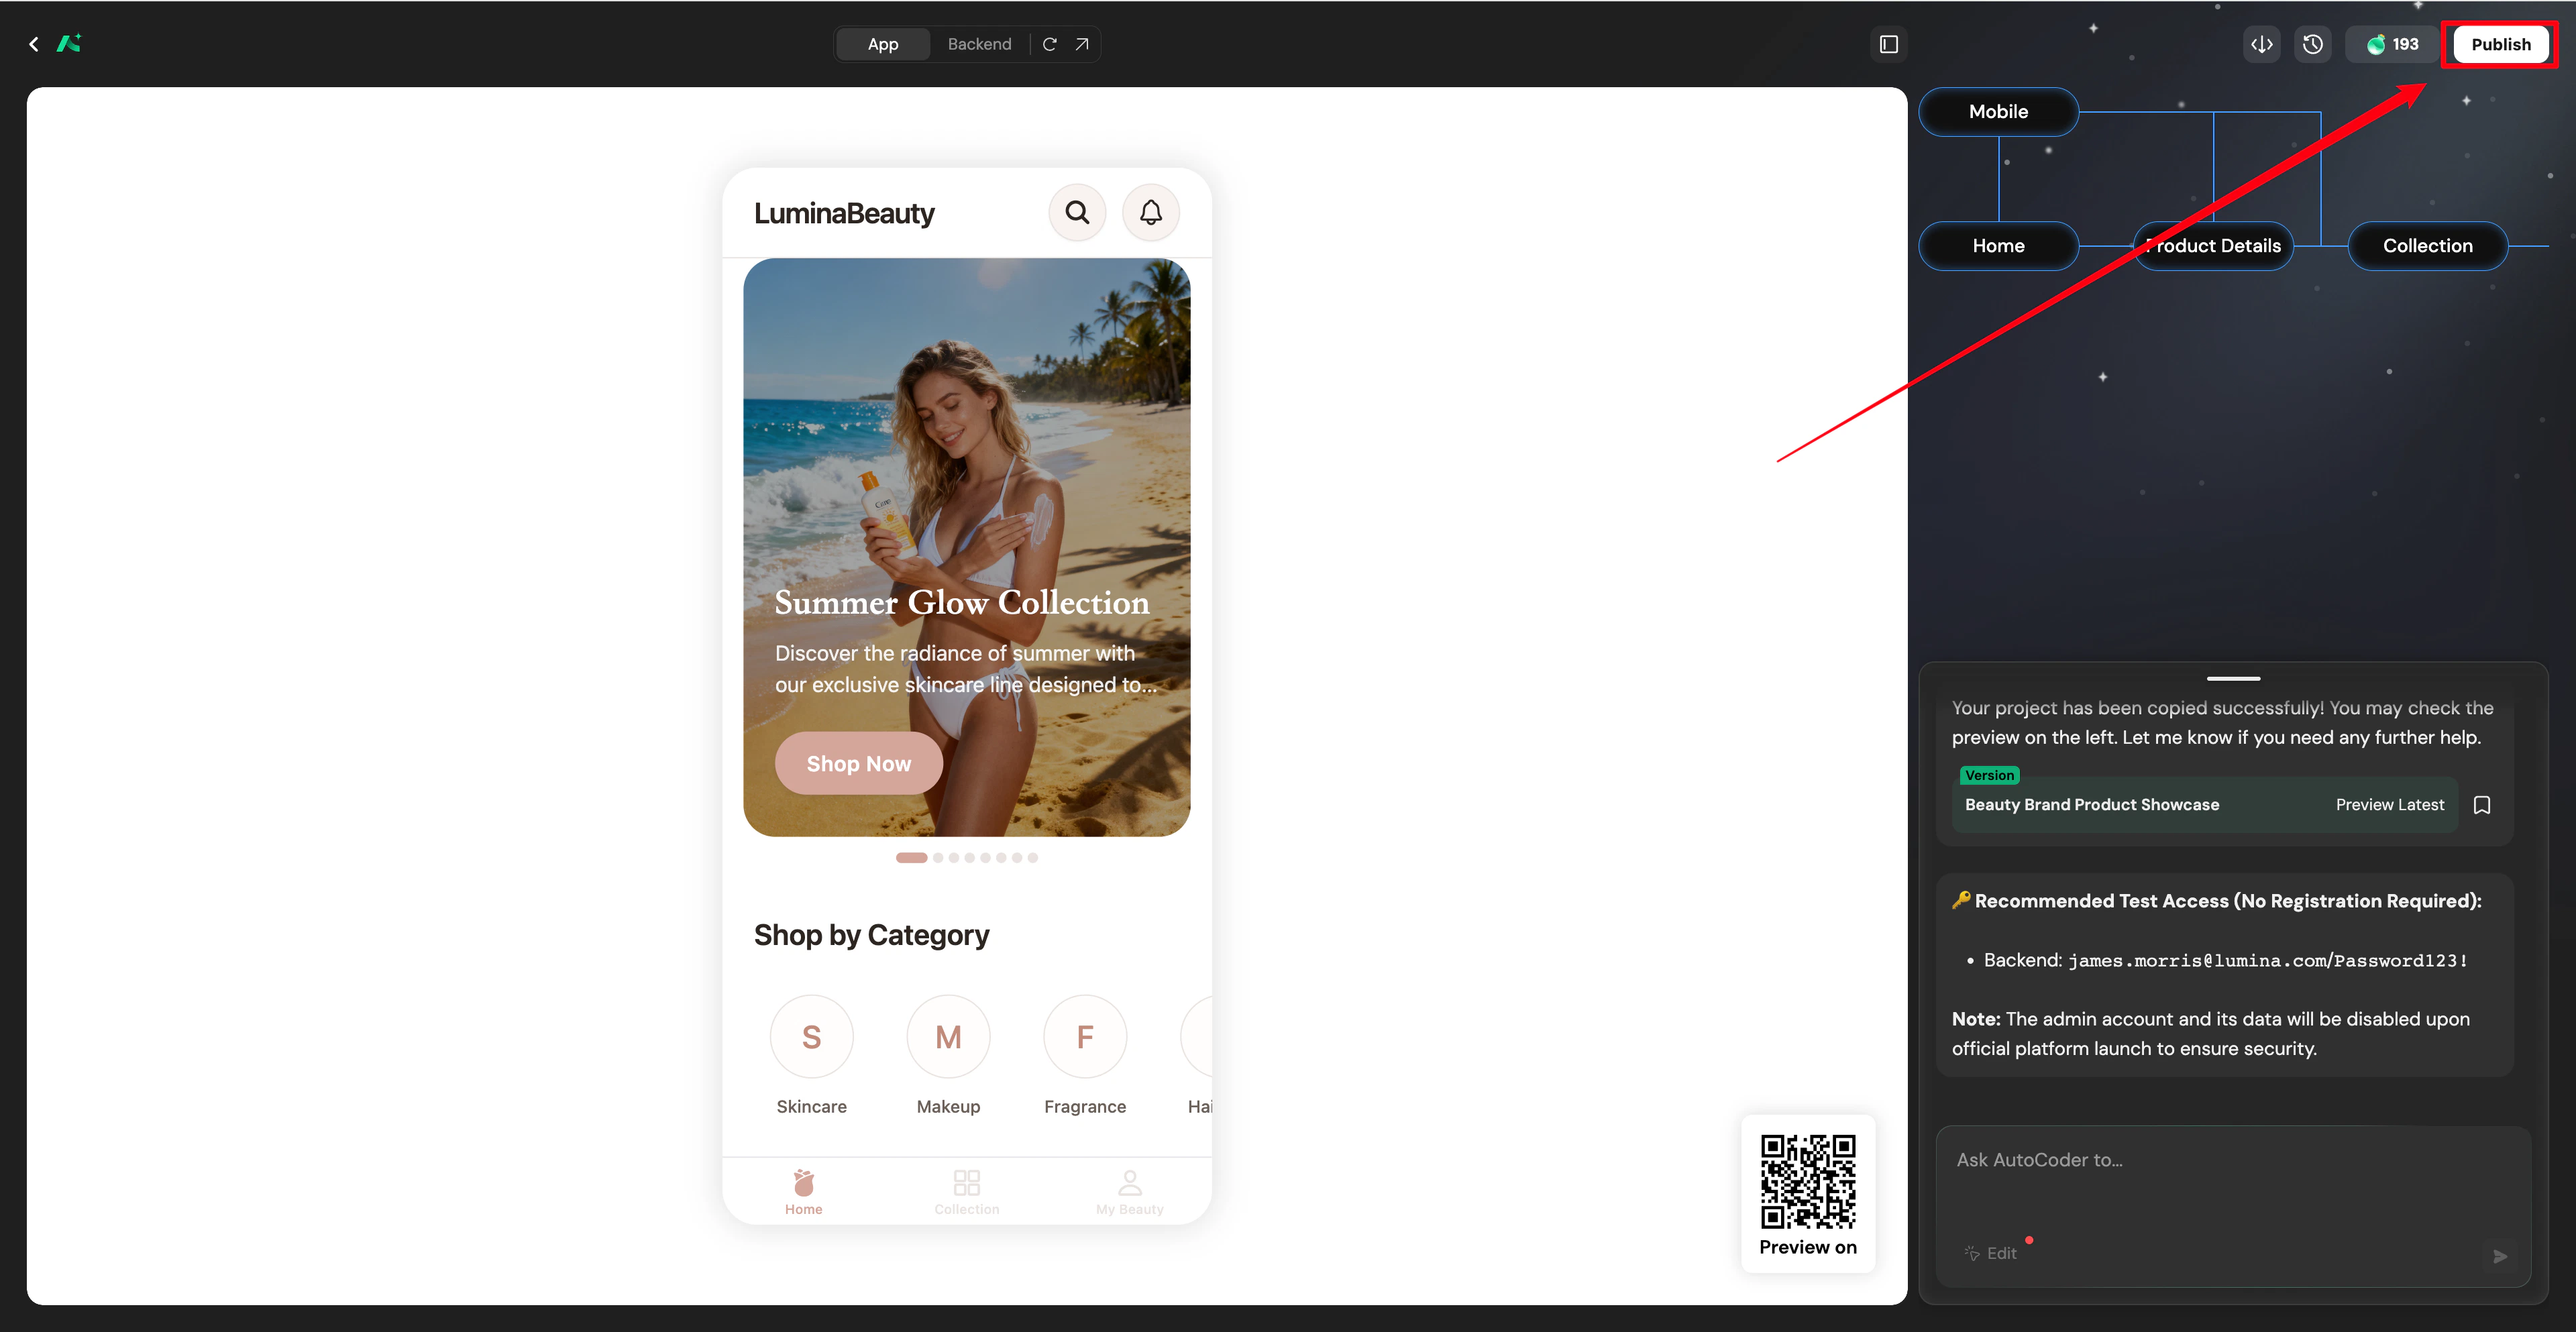
Click **Publish** in the top right corner of the editor.
Select the **Website** tab in the pop-up window.
Choose to configure a **Subdomain**, **Purchase a Domain**, or bind a **Custom Domain**. Optionally, toggle **Share to SparkVibe** to share your project with the community.
Click **Publish** to confirm your deployment.
## Project launch
Launch your project externally, including webside and domain configuration.
### Web deployment
Click **Publish** in the top right corner of the editor.
Select the **Website** tab in the pop-up window.
Choose to configure a **Subdomain**, **Purchase a Domain**, or bind a **Custom Domain**. Optionally, toggle **Share to SparkVibe** to share your project with the community.
Click **Publish** to confirm your deployment.
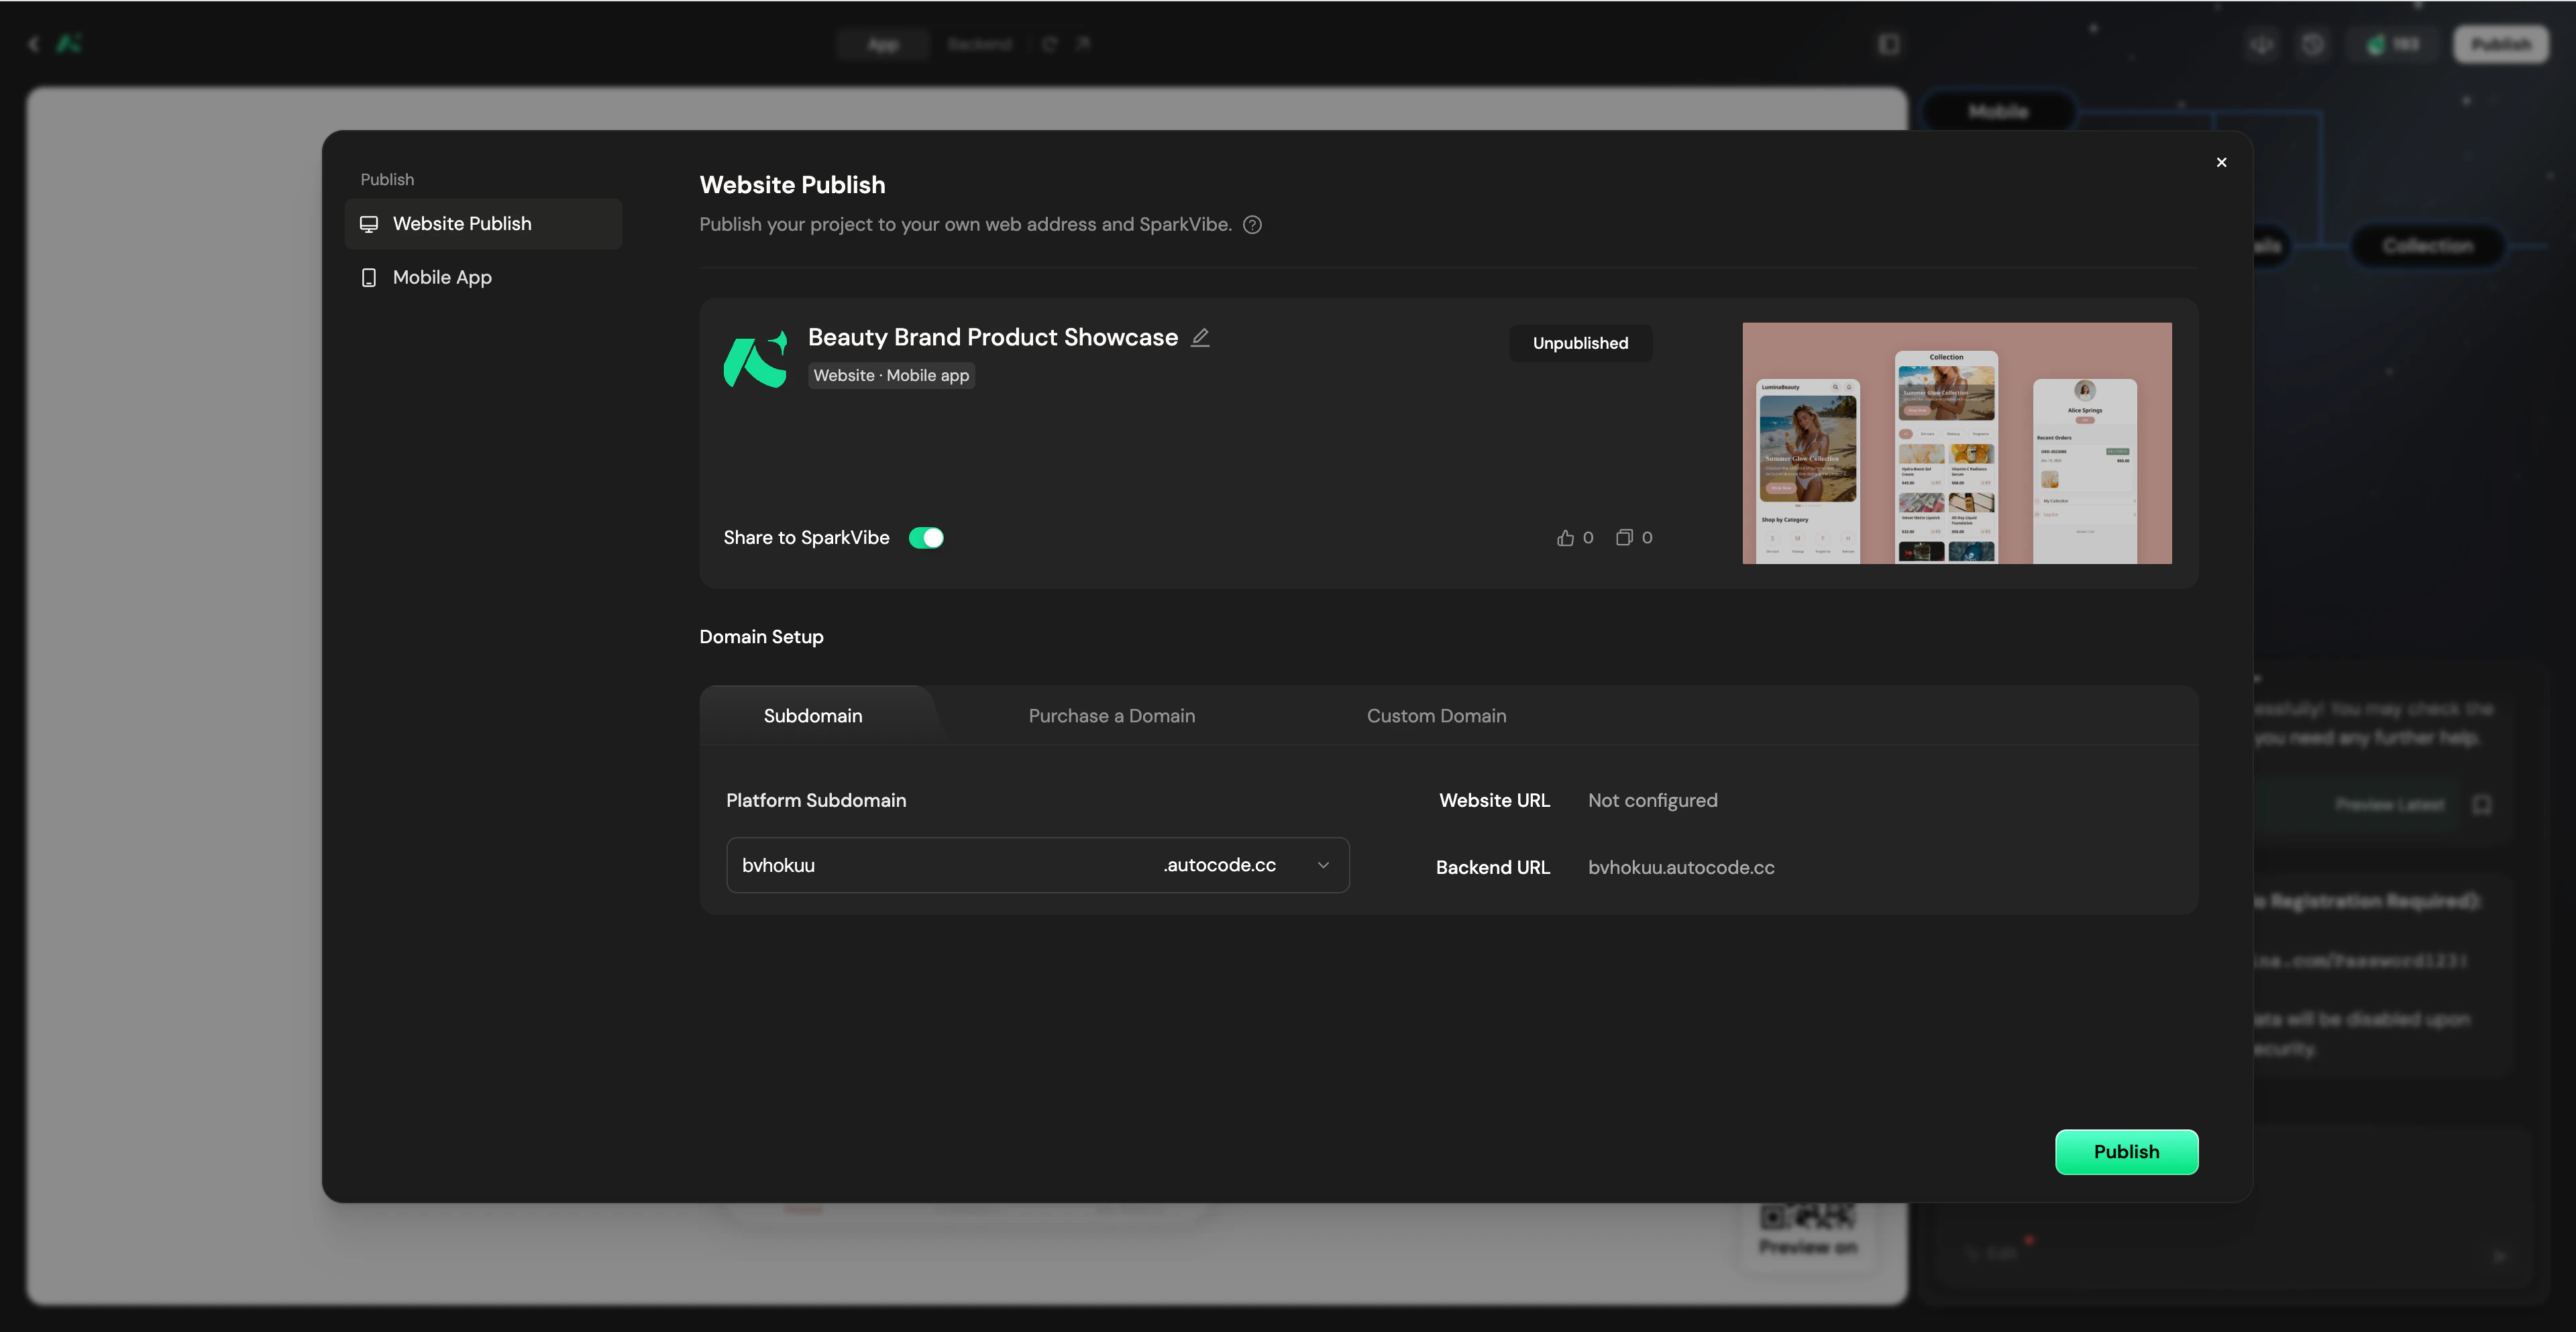 After deployment, the system generates two links: the frontend display link (**Website URL**) and the **Backend URL** for managing full-stack data.
***
## Domain options
### Platform Subdomain
All users (including Free plan users) receive a free `*.autocoder.cc` **Subdomain**.
* Enter your desired prefix in the **Subdomain** configuration tab to automatically assign it.
### Purchase a Domain
Want a professional domain without the hassle of manual configuration? You can buy domains directly inside AutoCoder.cc.
This feature is available for **Standard** and **Pro** plans.
In the **Purchase a Domain** tab, type your desired domain name to check availability.
Review the domain price plus a **\$9.99/year platform service fee**. Complete your payment securely via Secure Payment Gateway.
Once paid, the platform will automatically configure the DNS and apply a free auto-renewing SSL certificate for you. No manual setup is required.
* **No Refunds:** Domains are registered instantly and cannot be changed or refunded once paid. Please double-check your spelling!
* **Auto-Renewal:** Active by default to prevent expiration or loss of your website. You can manage this anytime in your Workspace.
### Custom Domain
This feature is exclusive to paid plans (the **Standard** plan supports binding 1 domain, and the **Pro** plan supports unlimited domains).
In the **Custom Domain** tab of the **Publish** pop-up, enter your third-party domain.
Log in to your domain provider (e.g., GoDaddy) and add the provided CNAME record to your DNS configuration.
Once added, return to AutoCoder.cc and click **Verify** to check the resolution status.
To enable HTTPS, you can either paste your certificate content (`CRT` and `KEY`) directly into the text fields, or click **Upload file** to upload your `.key` and `.crt`/`.cer` files.
### Primary Domain Settings
If you bind multiple domains (e.g., a platform subdomain and a custom domain) to a single project, you can designate one as the **Primary Domain** in the Publish Project settings by clicking the ⭐ (Star) icon. All other alias domains will automatically and securely redirect to your Primary Domain.
***
## App launch
Complete app packaging and test distribution.
The **Mobile App** tab is only displayed when your project includes a mobile application.
### Test package download (Android / iOS)
If you generated a mobile app, switch to the **Mobile App** tab after clicking **Publish**.
*Currently, AutoCoder.cc only supports generating and downloading Android APK test packages for installation testing. iOS test packages (.ipa files) and TestFlight distribution are not supported at this time.*
### App store launch
*Currently, the platform does not support directly publishing the generated app to Google Play or the Apple App Store. You must handle compliance and the submission process manually.*
***
## Export project
Get full control of the project.
After deployment, the system generates two links: the frontend display link (**Website URL**) and the **Backend URL** for managing full-stack data.
***
## Domain options
### Platform Subdomain
All users (including Free plan users) receive a free `*.autocoder.cc` **Subdomain**.
* Enter your desired prefix in the **Subdomain** configuration tab to automatically assign it.
### Purchase a Domain
Want a professional domain without the hassle of manual configuration? You can buy domains directly inside AutoCoder.cc.
This feature is available for **Standard** and **Pro** plans.
In the **Purchase a Domain** tab, type your desired domain name to check availability.
Review the domain price plus a **\$9.99/year platform service fee**. Complete your payment securely via Secure Payment Gateway.
Once paid, the platform will automatically configure the DNS and apply a free auto-renewing SSL certificate for you. No manual setup is required.
* **No Refunds:** Domains are registered instantly and cannot be changed or refunded once paid. Please double-check your spelling!
* **Auto-Renewal:** Active by default to prevent expiration or loss of your website. You can manage this anytime in your Workspace.
### Custom Domain
This feature is exclusive to paid plans (the **Standard** plan supports binding 1 domain, and the **Pro** plan supports unlimited domains).
In the **Custom Domain** tab of the **Publish** pop-up, enter your third-party domain.
Log in to your domain provider (e.g., GoDaddy) and add the provided CNAME record to your DNS configuration.
Once added, return to AutoCoder.cc and click **Verify** to check the resolution status.
To enable HTTPS, you can either paste your certificate content (`CRT` and `KEY`) directly into the text fields, or click **Upload file** to upload your `.key` and `.crt`/`.cer` files.
### Primary Domain Settings
If you bind multiple domains (e.g., a platform subdomain and a custom domain) to a single project, you can designate one as the **Primary Domain** in the Publish Project settings by clicking the ⭐ (Star) icon. All other alias domains will automatically and securely redirect to your Primary Domain.
***
## App launch
Complete app packaging and test distribution.
The **Mobile App** tab is only displayed when your project includes a mobile application.
### Test package download (Android / iOS)
If you generated a mobile app, switch to the **Mobile App** tab after clicking **Publish**.
*Currently, AutoCoder.cc only supports generating and downloading Android APK test packages for installation testing. iOS test packages (.ipa files) and TestFlight distribution are not supported at this time.*
### App store launch
*Currently, the platform does not support directly publishing the generated app to Google Play or the Apple App Store. You must handle compliance and the submission process manually.*
***
## Export project
Get full control of the project.
 ### Source code export
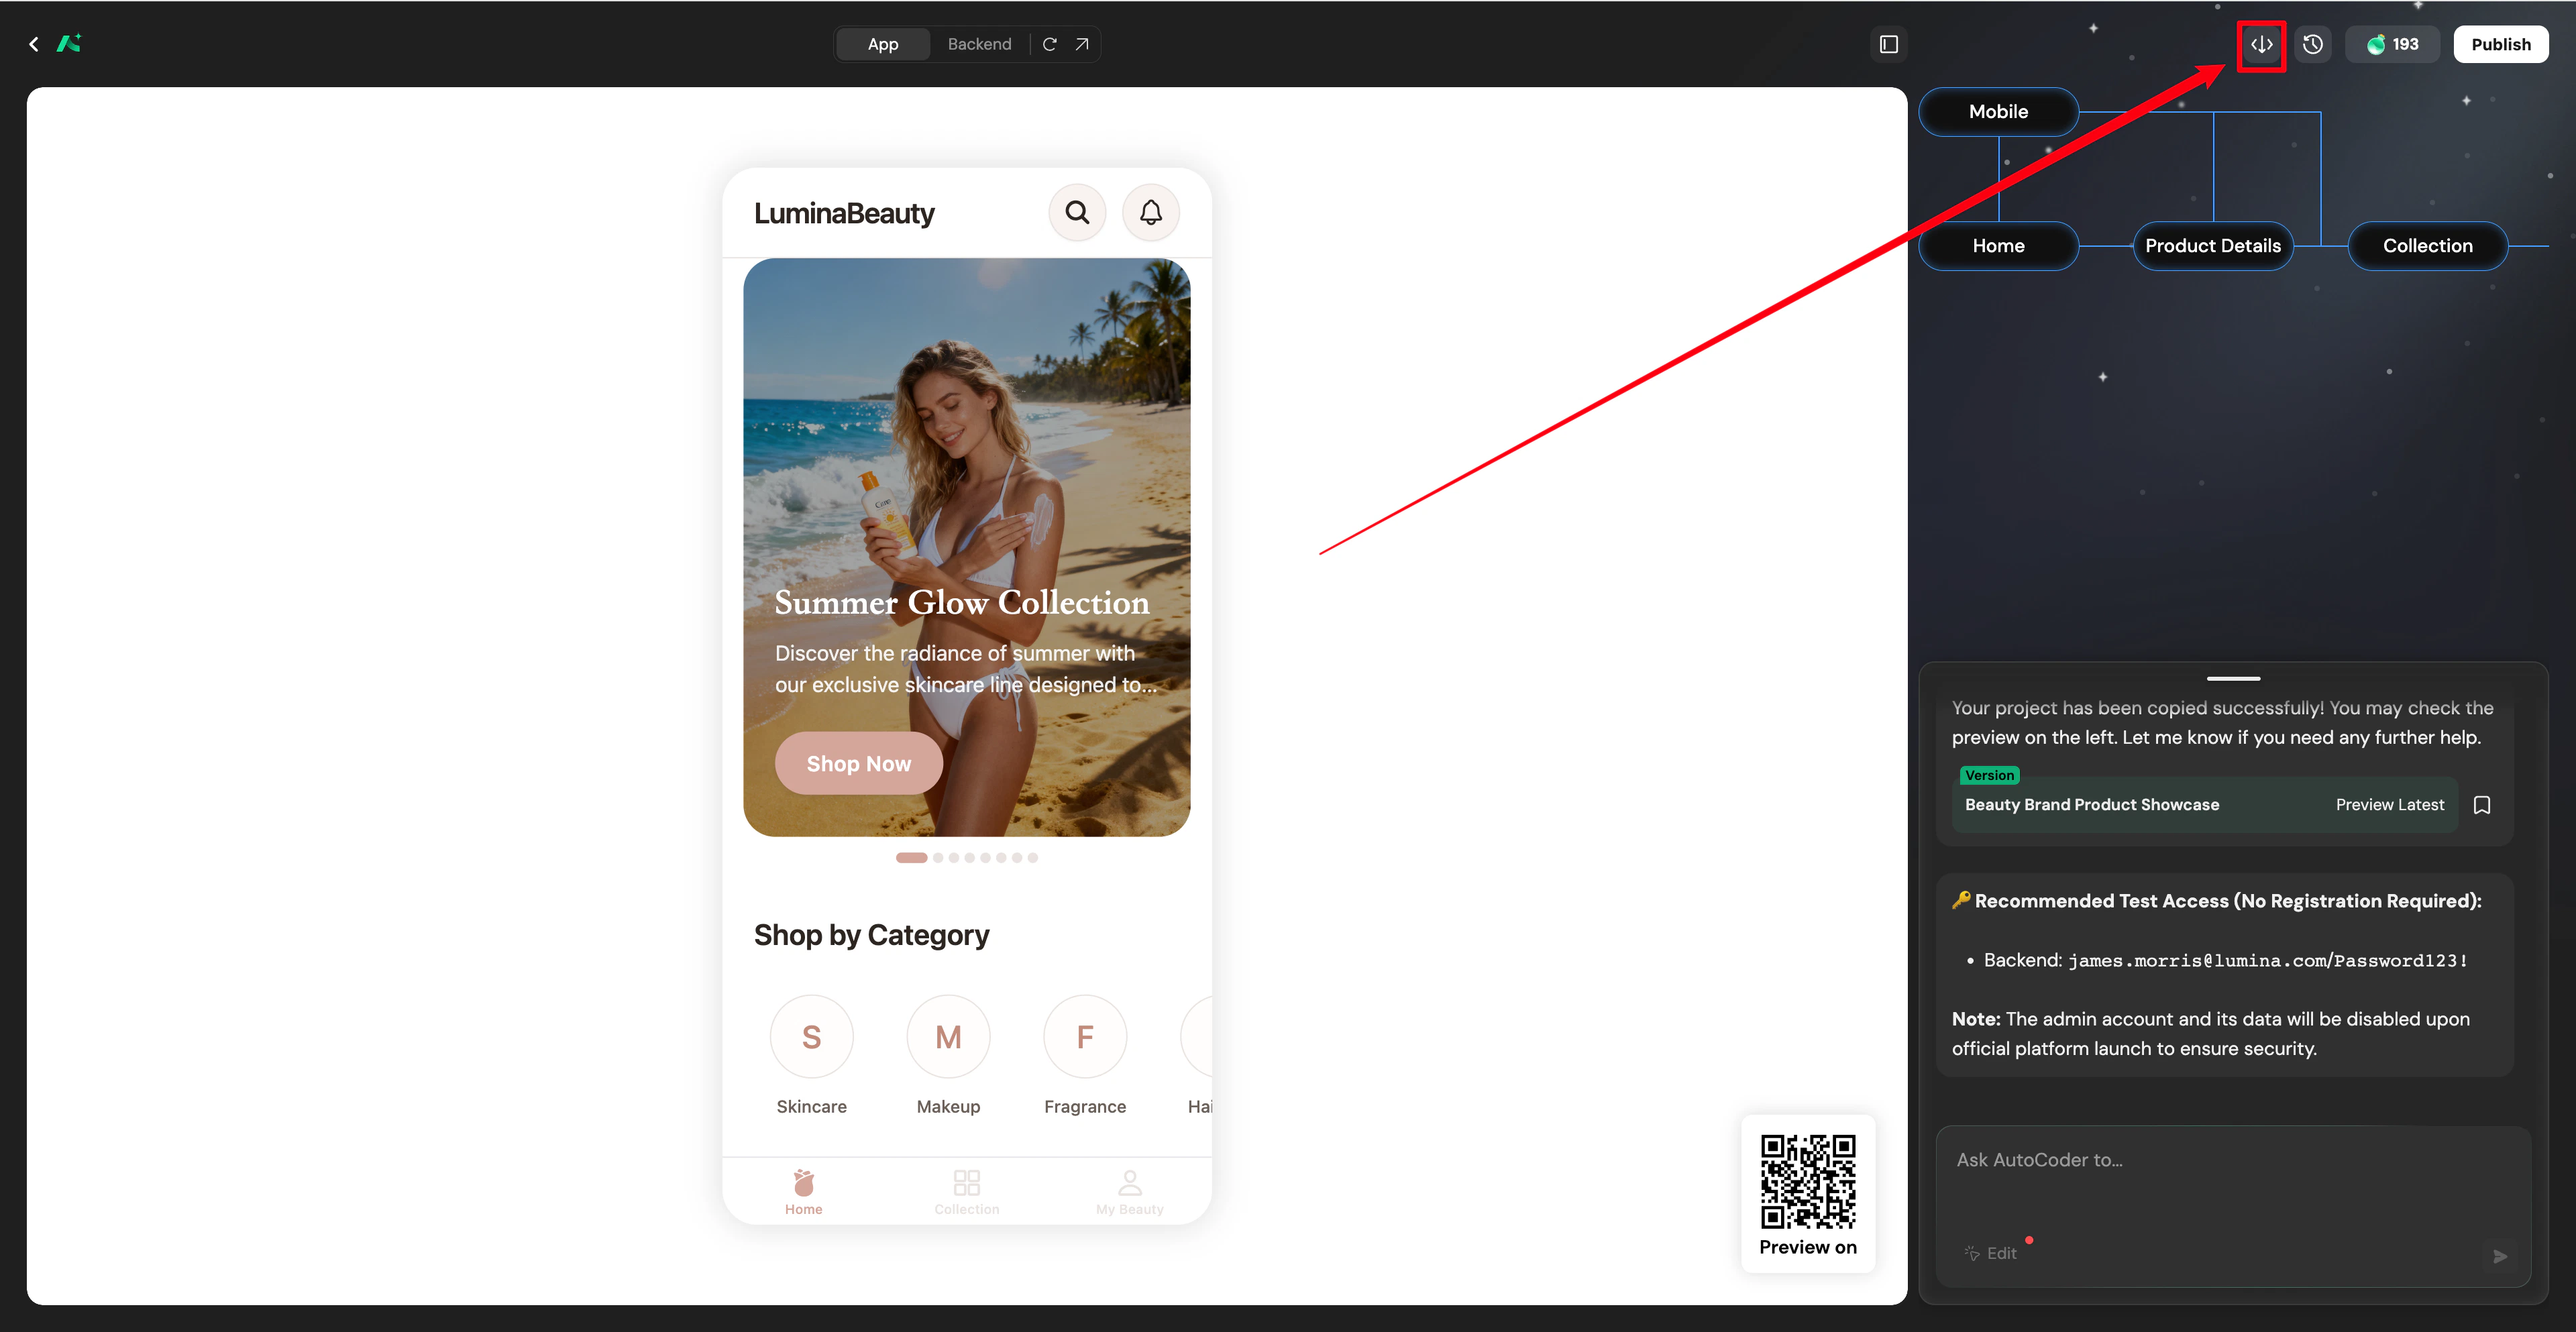
* **Source Code Export** is an exclusive feature of the paid plans. The Free plan does not support this operation.
* Package and download the complete production-grade code generated by AutoCoder.cc (including frontend UI, backend logic, and database schema) to your local machine. Deploy it to your own cloud server or a third-party hosting platform to achieve 100% ownership of your digital assets.
### Source code export
* **Source Code Export** is an exclusive feature of the paid plans. The Free plan does not support this operation.
* Package and download the complete production-grade code generated by AutoCoder.cc (including frontend UI, backend logic, and database schema) to your local machine. Deploy it to your own cloud server or a third-party hosting platform to achieve 100% ownership of your digital assets.